Let's do some fun things with gradient transparency.
- Add a new layer and Rename it Box Trap.
- Change the Trap Shape parameter on the Outside tab to Box.

 Transparent gradients |
|
Switch back to the Layers tab and Shift-click the Visibility icon on the Box Trap layer to toggle the other two layers off. This will help us to better see what we are doing with this layer. |
Since the Waves trap tendrils are white, let's make the Box trap shape a different color.
- In the gradient editor, edit the set of white control points so that the Red, Green, and Blue settings are 145, 147, and 253, respectively.
 |
Click Link Color and Opacity in the right-click menu in the Gradient editor. This allows us to move and edit the color and opacity curves simultaneously. Also, make sure that the opacity part of the gradient editor is visible — click the small opacity button to expand it if necessary. |
- Insert a new point in the gradient editor. Set the Opacity of this control point to 0. Also set the Red, Green, and Blue settings to 0 to create Black.
- Now Insert another control point to the right of that one. Change its Opacity to 255 and make it black, also. Click and drag this point until it is positioned just to the right of the transparent point.
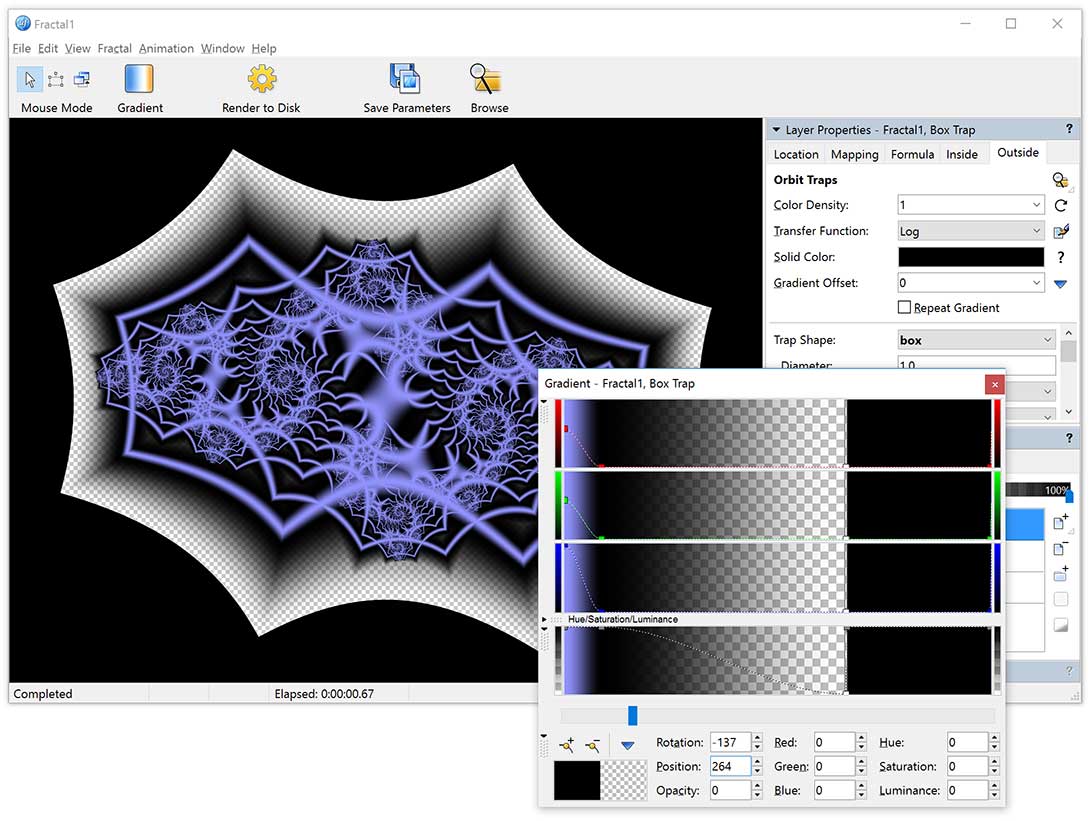
Although the exact location of the transparent areas may differ slightly, your image and gradient editor will look similar to this:

The gray and white checkerboard on both the gradient and the fractal layer indicates areas of transparency.
- To see how this works, change the Merge Mode of the Box Trap layer to Normal and then Shift-Click its Visible icon to toggle the other layers on and off.
Notice that the underneath layers are only visible in the checkerboarded area of the top layer.