Let's go back to the Orbit Trap coloring on the top (Web) layer and change some settings.
- Enter 5 in the Color Density setting, and select rectangle as the Trap Shape parameter.
We need to work with the gradient for this layer to better see the trap shapes, so open the gradient editor by selecting Gradient from the Fractal menu.
- Click and drag the set of white control points to the left to position 85. Click and drag the set of black control points to position 86.
This creates a sharp line between the white and black areas of your fractal.
- Now let's open up a new part of the gradient editor the Opacity bar by clicking on the little down arrow next to the word Opacity, just above the rotation slider. This opens a fourth horizontal band of color that looks right now very much like the other three.
Just as the opacity setting on the Layers tab controls the transparency of the entire layer, the opacity bar in the gradient editor allows us to assign different transparencies to the individual colors in our gradient.

 Transparent gradients |
By default, the opacity bar is empty. Let's link it to the color bars so they both contain the same control points.
 |
Right-click in the gradient editor and click Link Color and Opacity in the pop-up menu that appears. |
- Click on the set of white control points they are the ones at the tops of their respective color bands.
- Click and hold that same highlighted control point in the Opacity channel and drag it all the way to the bottom, keeping its position at 85.
Note: This can be a tricky maneuver with all the control points so close together. You can also enter the new opacity value (0) manually. Remember you can always Undo an unwanted change.
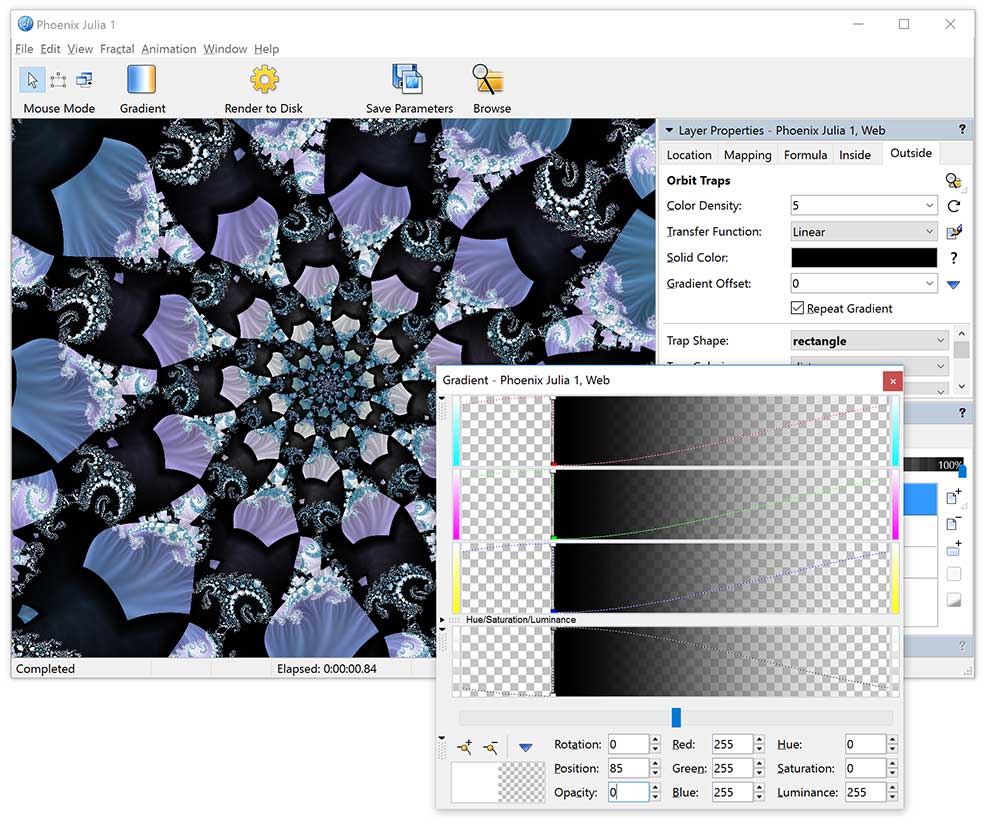
Your fractal and gradient should now look like this:

Note that the areas that were previously white are now completely transparent, allowing the Coloring and Texture layers to show through.